Monday, 8 February 2016

Star Card Tutorial

 Isn't this card delightful? And rather interesting? I think so, and love making it!
Here it is all opened out! So full of beauty! And, so many options!
So here are the instructions:


Here's what mine looked like before sticking them on to the card base.


To do both front and back, repeat the process twice. Here's the small triangle for the centre.


And here's another card, where I cut unevenly a little! Still looks fabulous, but goes to show truth to the adage, measure twice and cut once!


Saturday, 6 February 2016

The wedding anniversary...

In our family, we don't have many lasting marriages....... lots of heartache and divorce. So, my husband and I try to celebrate the ones in the family that are still going strong. This week, my lovely sister and brother in laws celebrated their anniversary. My sister in law loves purple, so it goes without saying, I had to use blackberry bliss (for card stock and ribbon - which I think is now retired). 

LOVE timeless elegance DSP, even though it is hard to cut up such gorgeous stuff! Hence why the panel goes from front to back! Actually, I love it this way. The stamps are from the free gifts from sale-a-bration for when you spend $110. Only available until 15th February, so you'll need to get them ASAP!
It's a fabulous kit, and have used it extensively over the last month.


sentiment inside is from teeny tiny sentiments

The inside of the card, using Sahara Sand from pack of timeless elegance cardstock. LOVE the idea of getting just the right colours to go with a set of DSP! Totally a genius idea!


Doesn't this look amazing? Such beautiful paper.

As you can see,I used three strands of ribbon, quite a tactile feeling card, as the sentiment is embossed too! SMOOTH!

The embossing technique is so enormously enjoyable! Stamp the image with versarmark, then your colour, add clear embossing powder, apply heat tool. WATCH the yummy colour come to life! BEAUTIFUL!

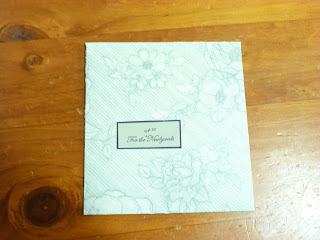
 The finishing touch has to be the envelope! Using the rest of the sheet of DSP, and the envelope bunch board, this was made in minutes! AGAIN, I used a teeny tiny sentiment to create the address label. (hand delivered, or the postie could have given it to ANYONE!)